Using the Rule of Thirds in Newborn Photography
So everyone has heard of this ever-important “Rule of Thirds”, right? Perhaps not. Known as the “Golden Rule” of photography for many reasons, it is a fundamental building block for knowing how to set & take your shots as well as how to more properly compose your picture. If this rule is new to you or you’re hearing about it for the first time, don’t be overwhelmed. Its key elements are simple to understand & actually quite natural & easy to follow. If you are already familiar with the rule & how to implement it then this information will not only refresh your understanding of the rule but can also be used in a comprehensive way to utilize it in portraits– specifically newborn photography. There are a few subtle nuances when applying this rule to pictures of babies in particular, & after a quick explanation (& maybe refresher for those who are already well-versed in this area) then we can really dive deeply into the idea & use of the “Rule of Thirds” when taking newborn portraits & photography.
What it’s All About
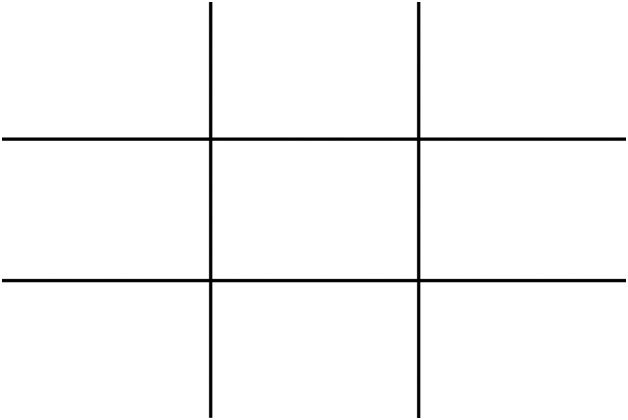
The “Rule of Thirds” has often been described as the fundamental building block of all rules of composition. Basically, in any image, it can be divided into 3 equally-spaced spaces by 2 lines both vertically & horizontally. Here are some visual examples:
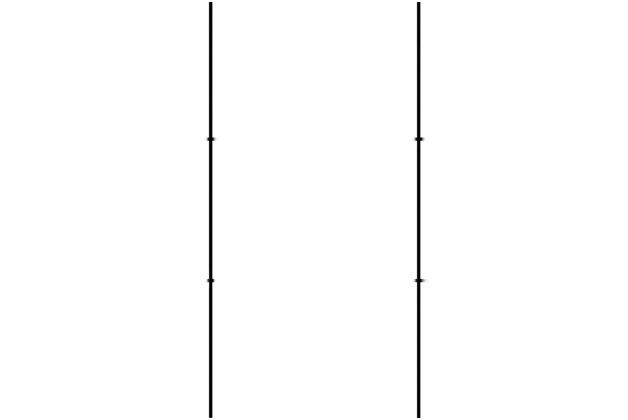
(Here, two imaginary vertical lines are drawn, creating 3 equal spaces.)
(Here, two imaginary horizontal lines are drawn, creating 3 equal spaces.)
(One combined, all 4 lines create 9 equal squares that lay over the image.)
One thing that should be specially noted is that while knowing where these imaginary lines are, the places where these lines intersect are of particular importance. Placing points of interest or your subject matter along or as near to these lines as possible, particularly where they cross/meet (an intersection), creates a much more pleasing composition than one where this rule is ignored.
(Here the points where the horizontal & vertical lines meet are accented– these are the intersection points [also can be referred to as “power point” or “crash point”] highlighted)
The most important thing to take away from this is that the main subject or region isn’t directly in the middle. The idea is to divide the picture space into areas that are in a 1:2 ratio rather than equal halves. For example, think of an image of a field where the horizon lies on the bottom line, thus creating a ratio where 1 third of the picture is the grassy land at the bottom & the other 2 thirds of the image is the sky. Here is an example:
(Notice the top ⅔ of the image is sky, the bottom ⅓ is the field. Also, take special note that the tree in this image is actually at an intersection where the imaginary horizontal & vertical lines meet on the bottom left!)
Reasons for Following the Rule
By following such a specific idea, you’re creating more interest in the art through tension & energy in the image; feelings not as easily conveyed if you simply centered the subject. It makes your shots more well-balanced, more intriguing. Studies have actually show that people’s eyes go to these intersection points more naturally than they do the center of the image, so the viewer is unable to interact more easily with the photo as far as really feeling what the idea of the shot is. It makes it so the image doesn’t end up looking static & without it appearing too busy, there’s still a depth & complexity that wouldn’t be as evident otherwise. Thus, the viewer will linger on the image for a longer amount of time because of this captivity & sense of being interactive, & what photographer doesn’t want a lingering audience, right?
Ways to Accomplish Using the Rule & Exceptions
Now don’t think these lines & space are a strict guideline in which subject matter should lie directly on the lines or points of intersections, because it really doesn’t actually need to in order to convey the same energy. As long as you’re near enough to the lines & cross points, you can still take full advantage of the rule. To utilize this rule, here is a couple of examples of ways you could do so:
● Try to align subject matter with the guidelines &/or the intersection points (*there are particular suggestions I will make concerning humans as subject matter that will be addressed a little later on.)
● Allow any linear features in the image to flow from section to section by placing them on the lines.
● Try placing the horizon of an image along the top or bottom horizontal line.
● Prevent diving the picture into halves by avoiding placing subjects in or around the center.
● Think more carefully about the shot, & be encouraged to make creative use of the negative space (the empty space around the subject) (*this is another important suggestion that I will go into more depth later where I’ll describe ways to accomplish this in the case of newborn picture-taking.)
● Exceptions can take place but must be done wisely. Obviously you don’t want to compromise the overall feeling you want to give to the viewer for the sake of strictly following the rule. So by not following the rules exactly won’t result in an awful shot. You’re just way more likely to end up with a fantastic one when you do in most cases!
● It’s worth mentioning that while by using a witty, editing eye & with carefully thought-out camera or subject framing you can do a good job of lining things up with the imaginary spaces, many cameras actually come with ways to add an overlay to the viewer that will let you have a clear visual of the lines & intersections.
How to Apply the Rule of Thirds in Portraits
Shooting with people as your subject poses its own challenges as well as creative opportunities you wouldn’t receive from taking pictures of nature or landscapes. You are able to position a person & manipulate the image far more easily, yet to add that unique, interesting quality to it you must give the placement of the face, body, eyes, & props a lot of thought. Mentioned before was how subject matter should try to be aligned along the lines. Particularly it is suggested faces lie at an intersection & that eyes should be as close to one of the horizontal lines as possible. By not placing the subject off-center (on either of the vertical) lines, there’s more breathing space & you’re also able to capture the environment surrounding the subject– often a very important part of the photo in general. Along with these things, let’s be frank: placing a person dead-center of a photograph can often time result in a mugshot type picture. No one wants that! Anyway, knowing a few of these basic rules of photographing people in general leads to our main topic of discussion: newborn portraits.
Applying the Rule to Newborn Photography
What’s different about newborn portraits? Well, a couple of things. First off: you’re dealing with a non-moving object (unless you’ve got a squirming baby, but you’re usually hoping that won’t be the case!). A great deal of thought & effort regarding placement is implemented here. Things to consider would be the outfit, accessories, & props included in the shoot. Their placement needs to be in sync with the guidelines as well as your newborn. Secondly: sometimes you will be taking images of not just the child, but of the mother, father, or perhaps a sibling as well. They will need just as much consideration in placement. One key hint in taking a picture with a newborn & a parent when following the rule is to consider setting the two at “counterpoints”: that is, having one subject on one intersection (imagine a parents face on the top right hand’s intersection, eyes in line with the upper horizontal line) while the other subject is at another intersection diagonally across from the other (the baby being held where the face is at the bottom left intersection, eyes in line with the bottom horizontal line). With more than one subject, the use of counterpoints will create the most balance effectively. Here’s a couple of good examples:
An idea you may want to consider is the direction in which the newborn’s eyes/face are aimed toward. When facing the dead space in the image, a deep, intriguing & more exciting overall feeling is captured. This really does enhance the image, having them turned toward or looking into an open area (or in the event they are with another prop or person, toward them).
Most of all with newborn photography you must have an editing eye & really focus on creating the image in your head prior to the shot; candid photos that follow the rule are possible but a lot more difficult to achieve. To plan & intelligently set up the baby consider ahead of time where you do want that negative space to be, or where other subjects will appear if they’ll be included in some images (remember the idea of counterpoints!) Make sure their outfits or props fit in the third it is contained in. Remember: the idea is to make the shot as complex & pleasing to look at to the eye while not appearing too busy or haphazard.
Examples
(All of these wonderful examples utilize the Rule of Thirds in newborn photography & are courtesy of http://www.naissancestudios.com/)
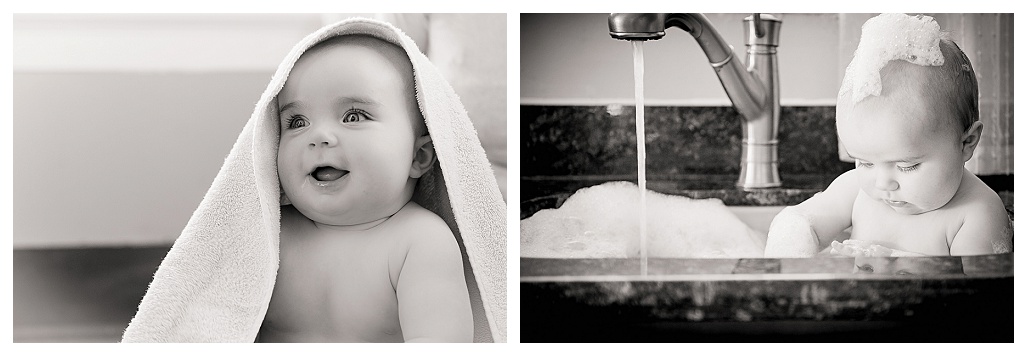
(Left image: Note the eyes are along the top horizontal line, the face is on the top right intersection, he is looking off into the dead space, and the darker part of the wallpaper in the background lies just on the lower horizontal line)
(Right image: The top of the marble countertop lies on the upper horizontal line while where the sink ends lies on the bottom. The baby is in off center in the right third of the image, looking toward his “props”)
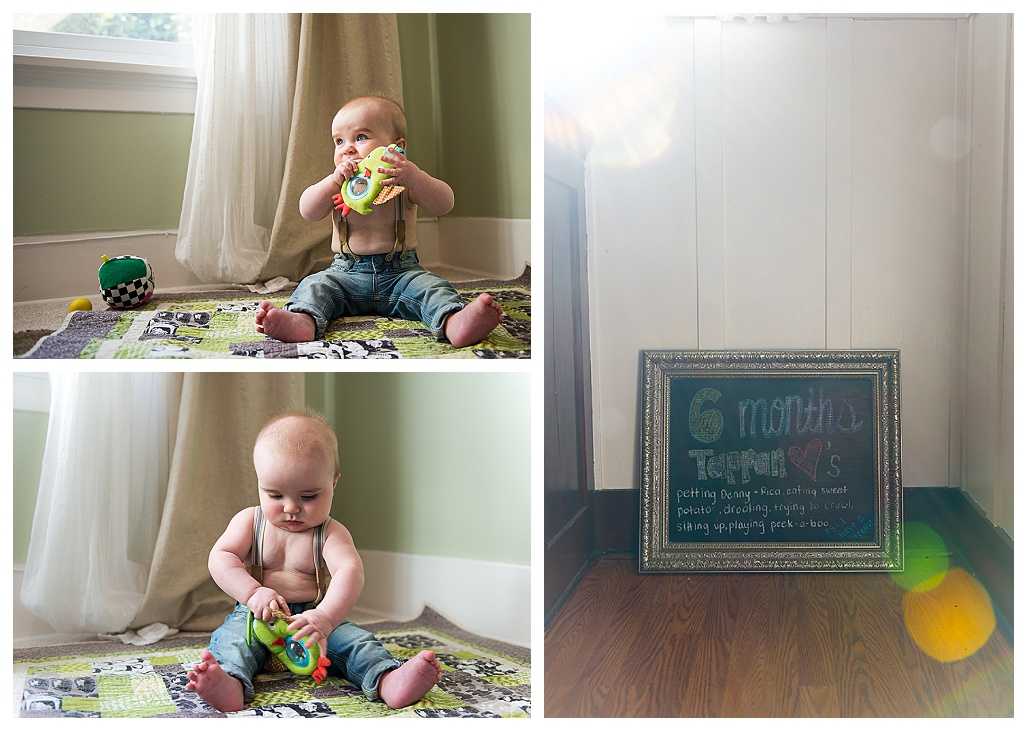
(Top left image: Great example. The eyes are lying just about on the top horizon while the carpet/floor is just where the bottom line would be. The body of the subject is on the right vertical line & the face is at a point of intersection.)
(Bottom left image: An example where there are exceptions that can be made & a good image is still produced. Take notice, though, that the 1:2 ratio of carpet/floor to wallpaper, where the wall is taking up the upper 2 thirds. While the baby is mostly centered, his eyes are still close enough to the upper horizontal line where it looks natural & appealing)
(Right image: Simple showing of 1:2 ratio: the floor takes up the bottom third while the wall takes up the upper two, creating a shot that is way more interesting than if the blackboard were dead-center in the middle.)
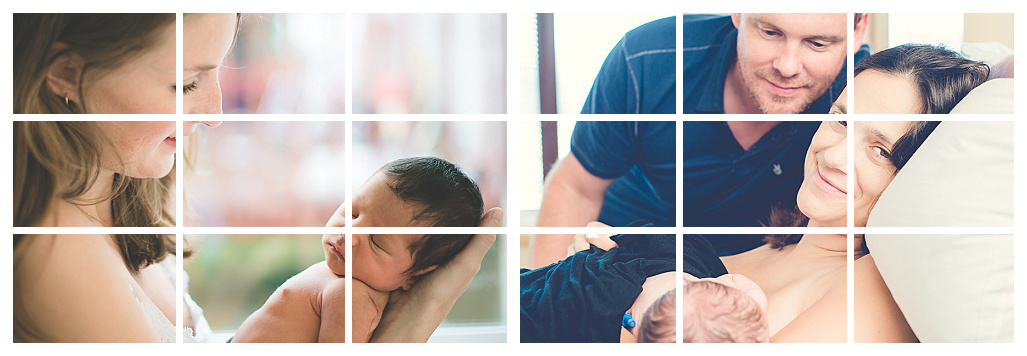
(This father and newborn are off-centered as well by running along the right vertical line with his eyes close enough to the top horizontal. The baby is included in 1/3 of the image, creating a good balance & feel to the image also note the directionality of the gaze.)
(While they are not at exact counterpoints with one another, it is a great example where the mother’s face is at the top right intersection, her body lies on the right vertical line, & the baby is along the bottom horizontal line. The mother is looking toward the other subject matter in the photo as her eyes lie quite nicely on the upper horizontal line.)
The Rule of Thirds: Not So Tough
It may seem like perfectly common sense that will be easy to execute or it may seem daunting, tedious & a task to fear, aiming to have your newborn photography fit into these guidelines. Regardless of how confident you may or may not be, know this: with practice, careful thought, focus, & appreciation of the image, subject matter, & desired effect of the image, you can accomplish beautiful, engaging, & ultimately more professional-grade work by utilizing the Rule of Thirds. It’s referred to as the “Golden Rule” for a reason! So don’t over-think or stress, but remember the simple rules, tips & tricks given to you & the extra work & thought put into each snapshot you take will really pay off, as your portfolio will turn into a masterful example of excellent quality work.
Credits
(Here are the links of where the photos were taken from in the order which they appear in the article. I do not claim any rights & give full credit to the sites that the pictures are originally from)
http://www.photovideoedu.com/Learn/Articles/jim-zuckerman-on-composition-the-rule-of-thirds.aspx
http://en.wikipedia.org/wiki/Rule_of_thirds
http://www.naissancestudios.com/

